Monday, January 8, 2024

Rooting Green Gooseberry Bushes from Hardwood Cuttings


Green gooseberries are a common type of berry from the large family of Ribes. My first encounter with them was when I was a child in Washington state visiting a friend of the family. He had long rows of gooseberry plants along with blackberries and raspberries growing in his backyard. The gooseberries were so beautiful in the sunlight as the light passed through their translucent skin. I must have happened to visit just as they were ripe as I remember the flavor to be be tart but sweet. Years later, one of my daughters bought me my own gooseberry plant. Since I live in the hot and humid climate of the Eastern Seaboard of the United States, growing the gooseberries was a little harder. However, I have found a spot where it receives about 6 hours of sunlight per day and some shade during the hot afternoon hours.


Now, since I know that I can root my red currant bushes pretty simply, I found with a little research that gooseberry bushes are also easy to propagate with cuttings. 
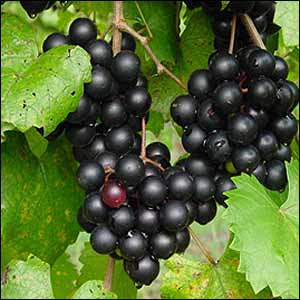
Gooseberry Bush


First you are going to need a plant pot filled with equal parts of dampened coconut coir and vermiculite or something similar. Press the mixture firmly into the pot with the heel of your palm. Poke a hole into the firmed mixture with a wooden dowel or pencil or screwdriver. The depth of the hole should be enough to leave just one leaf node showing after planting.


Now take your cutting and inspect it after rinsing it. The bottom angled cut should be green and not dried out. Scrape a little section of bark from about an inch or two from the bottom on one side of the cutting. Dip the cutting immediately into some rooting hormone and then into the prepared pot. Repeat for other cuttings. An 8-inch pot can hold 6-8 cuttings. Press the soil firmly around the cuttings to make sure the cutting has good contact with the damp rooting mixture. Water lightly.

Place a cover like a plastic bag or a glass jar or cloche over the cuttings to hold moisture around the stems.
Fancy Plant Cloche


And now comes the hard part - waiting.  You will feel like an eternity has passed before you see a little root coming out from the bottom of the pot. Make sure that you check the cutting at least once a week to open the cover and let fresh air in. You can also check the moisture of the soil and add a little water if you think it feels dry.

I keep my cuttings out of direct sunlight in a unheated greenhouse over the winter. 


Expect the gooseberry bush cuttings to take 3-4 months to root.


Once you see the roots emerging from the bottom of the plant pot, carefully repot each rooted cutting into its own pot and water. Keep the cutting covered until you see leaves forming. Once the rooted cutting has formed leaves, you can move it outside to a permanent setting either in a large pot or in the ground. 


Plant outside in permanent position


That is how you grow green gooseberries from cuttings. Once your bush has grown over a couple of years, you can repeat the process and multiply your harvest simply with cuttings.

You can make a tart gooseberry jam with any berries left over from eating fresh. I like combining raspberries with gooseberries to make a beautiful and tasty jam.

Gooseberry jam


If you need to find a source for fresh cuttings, you can check out my Etsy shop, here: https://www.etsy.com/shop/wildflowerrun, or scan here:


WildflowerRun

Wednesday, March 30, 2022

How to Root Hydrangea Cuttings


Have you every seen a beautiful hydrangea in bloom at a friend's house and wished you had one in your yard? You could probably ask for a cutting of one of the branches if you dared, and try rooting your own plant that would be an exact replicate.


The Hydrangea, is a common flowering shrub found often beside older homes on the East Coast. It is also known as hortensia, but it is actually a genus of over 75 species of flowering plants native to Asia and the Americas. The most commonly planted hydrangea is the Bigleaf Hydrangea, (Hydrangea macrophylla) with large blue to pink flowerheads, depending on the acidity of the soil which affects the availability of aluminum to the flower. In the wild, the typical flower color is white and with much smaller flowerheads.


The hydrangea is one of the plants that take very well to rooting from cuttings whether you take cuttings in the summer or in the late fall while the plant is dormant. Look for healthy plants and branches that look strong and without any bug damage or disease. The best cuttings are from the current year's growth.


Here is a simple method of rooting:

1. Take 6-inch sections with two growth nodes. I like to make an angled cut just below a node and then a straight cut just above a node. If you are taking actively growing cuttings, remove the bottom leaves and cut the top leaves in half to reduce water evaporation.

2. Set the cutting into a container of room temperature water to make sure the cutting does not have a chance to dry out while you are getting ready to work with them.

3. Fill a 6-inch pot with a potting mix. I like to use a 50:50 mix of vermiculite and coconut fiber but there are many others that would work as well. You want a soil that will allow free drainage of the water and yet holding enough moisture next to the cutting to encourage rooting.

4. Water the pot until you see the water draining from the bottom. 


5. Poke holes in the damp soil with a stick or pencil about the same diameter as the cuttings and about 3 inches deep.

6. Dip the cuttings into rooting hormone if you have it. This is an optional step as the hydrangea will likely root without it, but the rooting hormone increases your odds of success.


7. Set the cutting into the prepared holes and press the soil mixture firmly around the base of the cutting.

8. Cover the container with something clear to allow light to pass through but hold moisture, unless you live in a humid area.

9. Set the hydrangea cuttings in a bright (but not direct sunlight) and warm area (no more than 70-75 degrees F) for 4 to 6 weeks. Lift the cover (if used) every day to refresh the air.

10. Remove the cover when you see signs of growth and be careful not to let the soil dry out.

11. Transplant the cuttings when you see they are actively growing into individual containers filled with regular potting soil and water well until you are ready to plant them outdoors for the summer.


That's it. Not a hard process at all. Once the cutting takes root, the plant will grow quickly - even 24 to 36 inches in its first year. Why not give it a try and grow your own hydrangea or maybe a whole collection of hydrangeas!


If you don't have access to a shrub from which to take cuttings, you can purchase them from my Etsy page here, Wildflower Run as I do offer them when available from my bushes.


Wednesday, March 16, 2022

How to Propagate Kieffer Pear Trees from Cuttings

Kieffer Pears

The Kieffer pear is a tree that was gifted to me several years ago. I have very little to do to keep the tree looking good and producing fruit beyond giving it a yearly pruning in the winter. Only recently did I find that you can propagate the cuttings from a Kieffer Pear. Now granted, they are not nearly as easy as a willow cutting which just seems to want to root as soon as you try, but with some trial and error, the Kieffer pear cuttings will root over time.

The Kieffer pear is a hybrid between a European pear and a Chinese Sand pear with large crisp yellow fruit. I have to pay close attention or the squirrels will eat them just as they are about to ripen. I pick them while they are still firm and let them ripen inside safe from the wild harvesters.


Pear trees generally need between 200 and 800 chill hours of temperatures between 45 and 32 degrees to produce fruit. The Kieffer Pear needs about 400 chill hours and tolerates hot weather.


Since the Kieffer Pear is a hybrid, you can only use asexual propagation to reproduce the same plant. 

Kieffer Pear Blossoms


According to my research, the best way to propagate Kieffer Pear tree cuttings is the following:
  • Prepare a 50:50 mixture of dampened vermiculite and coconut coir
  • Fill a plant pot with at least 4 inches of the mixture
  • Take either dormant or softwood cuttings and make sure the bottom angled cut is fresh and not dried out
  • Dip the bottom of the cutting in rooting hormone
  • Place the treated cutting in a prepared hole that is about 4 inches deep so that only one growth node is above the soil line
  • Press the planting mixture firmly around the cutting
  • Cover the container with clear film or a cover to allow light in but to also provide a humid environment for the cutting
  • Place the cuttings under grow lights for 12 hours a day at about 72 degrees (F)
  • Watch the cuttings for the next couple of months, lifting the cover every week or so to refresh the air and to make sure the soil stays moist.
  • Once you see signs of root growth, transplant to a larger pot with regular potting soil and continue to water and make sure it gets 12 hours of sunlight a day.
  • In the fall, allow the new plant to hibernate over the winter outside either in a pot or in a protected spot in your garden.
  • Keep the soil moist for a least the first year after planting. 
So why not give this method a try and see if you can't produce a new tree for your food forest or backyard garden. If you don't have access to a Kieffer Pear tree, I do sell them for a few weeks of the year on Etsy here, Wildflower Run

Wednesday, January 19, 2022

How to Root Cherry Tree Cuttings (And Other Stone Fruits)


How many times have you seen an old cherry tree and wished you could have such a tree in your own yard. Just imagine going out in the summer and picking your own fresh cherries. Well you can! Ask the owner of the tree if you can take a few cuttings for yourself. Most of the time, the tree needs to be pruned in the winter while the tree is dormant to be ready for spring growth. Those cuttings normally just get tossed away as compost. 

  • Look for pencil-sized thickness in cuttings about 6 to 8 inches long with several nodes. 
  • Try to get the tops of the shoots from last year's growth
  • Make sure to remove any flower buds as you want roots first
  • Look for green under the bark to make sure you have a viable cutting


Rooting Method
  1. Place the cuttings into a container of room temperature water as soon after you cut them from the tree as possible. You don't want the cut ends to dry out or you will have to recut them. I like to cut them so that the top has a straight perpendicular cut while the bottom has an angled cut.
  2. Prepare a 6-inch deep rooting container by filling it with a 50:50 mixture of vermiculite and coconut coir that has been well moistened but is not wet. Press the mixture into the container  and then use a stick or pencil the same size as the cuttings to poke holes at least two inches apart.
  3. Dip the bottom end of your cutting into rooting hormone, tap off the excess
  4. Place the treated cutting into the prepared hole. Repeat for as many cuttings as you have.
  5. Press the soil mixture firmly around the cuttings so that there are no gaps.
  6. Cover the whole container with a lid or some sort of covering to keep the moisture from evaporating.
  7. Set the container on a heated mat or in a heated greenhouse of about 75 degrees F.
  8. Watch the cuttings for the next 6 to 8 weeks and remove the cover several times during the week to allow for fresh air and mist if necessary.
  9. Transplant carefully to a plant pot filled with regular potting soil when you see signs of rooting.
  10. Keep the newly grown cherry tree in the warm and bright conditions until the outside soil is 60 degrees and you can plant directly into the ground.
Note: Cherry cuttings are more difficult to root than other plants, but you can expect 50% success with this method.

If you don't have access to a cherry tree for cuttings, you can order them from Etsy where I sell some from my trees here, Wildflower Run
 

Monday, January 10, 2022

How to Root Muscadine Grape Vine Cuttings

Beautiful Muscadine Grapes

I have been growing grapes for almost fifteen years from cuttings I found while walking through my neighborhood. There was an old dilapidated house that was slowly sinking into the creek, but this house had a short fence with grape vines rambling over and around the old metal bars. One day in late October, as I walked my normal route, I realized that a neighbor had done a lot of pruning to the old vine and left the cuttings to dry up and rot away. Somewhere in the back of my brain, I remembered that grape vines could be encouraged to root and then sprout back into life. I took my treasure home and  found a spot in my yard to "plant" them in a trench about 6 inches deep. From the fruit I had seen during the summer, I thought they were Concord grapes, and figured they couldn't be that hard to grow.

Well, here it is now over a decade later and every year we get a nice harvest from the nine vines that grew from those cuttings. Almost nothing bothers the vines or the fruit except for a few rascally beavers that every few years will come along and bite through the nice thick base of the vine only to find that nothing falls down and he resorts to eating the lower portion of the vine down to the ground. As aggravating as it is, I know I can take cuttings from the leftover suspended vines on the trellis and that the roots will push out a new vine in the spring.

Inside the Muscadine grape vines


My muscadine grape vines were a little more pampered. I bought them as rooted plants from a fancy nursery store and then planted them at the end of my yard. They were slow to get started but mostly because the soil was really poor and although I added a few inches of mulch over their base, the root zone was compacted.


They now grow a mile a minute during the growing season. Their black fruits are somewhat similar to a Concord grape in that they have a tougher outer skin that is quite tart. but the inside is very sweet.

Muscadine Grape Vine Cuttings


So just how do I root the cuttings from my muscadine vines? (Note that these are non-patented vines) Well, I have two methods:

Fall and winter planting of dormant vine cuttings:

Note: I think (but I have not found sound research to prove this) the muscadine vines need a cold stratification time after they lose their leaves in the fall so if you are collecting cuttings in the early fall months, I recommend at least 48 hours in the freezer before taking the following steps. Otherwise, cuttings collected in the winter have already gone through natural stratification and are ready to start rooting

  • prepare a rooting soil mixture of 50:50 vermiculite and sand or something similar
  • poke holes in the soil mixture about the depth of two thirds of the length of the cuttings
  • soak the cuttings in hot water (around 120 degrees F) for about 10 minutes
  • remove them from the water, blot off excess moisture and dip in rooting hormone
  • place the hormone covered end into the prepared holes 
  • press the soil mixture firmly around the base of the cutting
  • cover the rooting container loosely to hold in moisture.
  • place the container on a heat mat held at about 80 degrees F. in a shaded area
  • watch the cuttings for about 5-8 weeks making sure to keep the soil damp but not wet
  • once you see a callus form around the base of the cuttings, transplant the cutting into another container with regular potting soil and keep moist and still on the warming mat
  • check the cuttings carefully over the next couple of weeks to watch for the buds to swell. When you see signs of life, move them off the warming mat and under lights to encourage upper growth. 
Basically, you now have a tender young grapevine. You can start to harden it off by bringing it outside for a few hours at a time - if the ground is 60 degrees F or warmer. Don't try to plant it outdoors in the late fall or the cold stress might kill it.


Summer Rooting:
This is a much easier time to encourage muscadine grape vine cuttings to root.
  • take a basal cutting of the current year's growth that is a little thinner than a pencil.
  • remove all the leaves except for the top leaf and cut that in half. 
  • prepare your dampened rooting mixture of 50:50 vermiculite and coconut coir
  • poke holes in the soil mixture about the depth of two thirds of the length of the cuttings
  • dip the end of your cutting in rooting hormone 
  • place the angled end into the prepared holes and press the soil mixture firmly around the base of the cutting
  • cover the rooting container loosely to hold in moisture.
  • set aside in a warm and shaded area for 6 to 8 weeks. You should see plenty of root and maybe  leaf growth by the end of this time.
  • remove the covering when you see leaves budding out and keep the soil damp
  • plant into regular potting/garden soil after the leaves open
If you don't have access to a muscadine grape vine, I do sell cuttings from my plants during the year on Etsy here, WildflowerRun.