 |
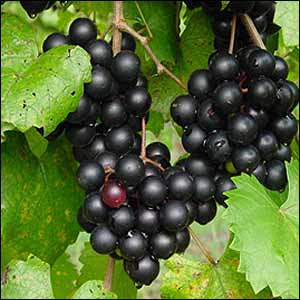
Beautiful Muscadine Grapes
|
I have been growing grapes for almost fifteen years from cuttings I found while walking through my neighborhood. There was an old dilapidated house that was slowly sinking into the creek, but this house had a short fence with grape vines rambling over and around the old metal bars. One day in late October, as I walked my normal route, I realized that a neighbor had done a lot of pruning to the old vine and left the cuttings to dry up and rot away. Somewhere in the back of my brain, I remembered that grape vines could be encouraged to root and then sprout back into life. I took my treasure home and found a spot in my yard to "plant" them in a trench about 6 inches deep. From the fruit I had seen during the summer, I thought they were Concord grapes, and figured they couldn't be that hard to grow.
Well, here it is now over a decade later and every year we get a nice harvest from the nine vines that grew from those cuttings. Almost nothing bothers the vines or the fruit except for a few rascally beavers that every few years will come along and bite through the nice thick base of the vine only to find that nothing falls down and he resorts to eating the lower portion of the vine down to the ground. As aggravating as it is, I know I can take cuttings from the leftover suspended vines on the trellis and that the roots will push out a new vine in the spring.
 |
Inside the Muscadine grape vines
|
My muscadine grape vines were a little more pampered. I bought them as rooted plants from a fancy nursery store and then planted them at the end of my yard. They were slow to get started but mostly because the soil was really poor and although I added a few inches of mulch over their base, the root zone was compacted.
They now grow a mile a minute during the growing season. Their black fruits are somewhat similar to a Concord grape in that they have a tougher outer skin that is quite tart. but the inside is very sweet.
 |
| Muscadine Grape Vine Cuttings |
So just how do I root the cuttings from my muscadine vines? (Note that these are non-patented vines) Well, I have two methods:
Fall and winter planting of dormant vine cuttings:
Note: I think (but I have not found sound research to prove this) the muscadine vines need a cold stratification time after they lose their leaves in the fall so if you are collecting cuttings in the early fall months, I recommend at least 48 hours in the freezer before taking the following steps. Otherwise, cuttings collected in the winter have already gone through natural stratification and are ready to start rooting
- prepare a rooting soil mixture of 50:50 vermiculite and sand or something similar
- poke holes in the soil mixture about the depth of two thirds of the length of the cuttings
- soak the cuttings in hot water (around 120 degrees F) for about 10 minutes
- remove them from the water, blot off excess moisture and dip in rooting hormone
- place the hormone covered end into the prepared holes
- press the soil mixture firmly around the base of the cutting
- cover the rooting container loosely to hold in moisture.
- place the container on a heat mat held at about 80 degrees F. in a shaded area
- watch the cuttings for about 5-8 weeks making sure to keep the soil damp but not wet
- once you see a callus form around the base of the cuttings, transplant the cutting into another container with regular potting soil and keep moist and still on the warming mat
- check the cuttings carefully over the next couple of weeks to watch for the buds to swell. When you see signs of life, move them off the warming mat and under lights to encourage upper growth.
Basically, you now have a tender young grapevine. You can start to harden it off by bringing it outside for a few hours at a time - if the ground is 60 degrees F or warmer. Don't try to plant it outdoors in the late fall or the cold stress might kill it.
Summer Rooting:
This is a much easier time to encourage muscadine grape vine cuttings to root.
- take a basal cutting of the current year's growth that is a little thinner than a pencil.
- remove all the leaves except for the top leaf and cut that in half.
- prepare your dampened rooting mixture of 50:50 vermiculite and coconut coir
- poke holes in the soil mixture about the depth of two thirds of the length of the cuttings
- dip the end of your cutting in rooting hormone
- place the angled end into the prepared holes and press the soil mixture firmly around the base of the cutting
- cover the rooting container loosely to hold in moisture.
- set aside in a warm and shaded area for 6 to 8 weeks. You should see plenty of root and maybe leaf growth by the end of this time.
- remove the covering when you see leaves budding out and keep the soil damp
- plant into regular potting/garden soil after the leaves open
If you don't have access to a muscadine grape vine, I do sell cuttings from my plants during the year on Etsy here,
WildflowerRun.


